Screwdriving
This program command is used for screwdriving. A screwdriving program must be created on the Spin Dashboard before this command can be used. See the Spin Dashboard documentation for more information. When run the robot will move to the target pose and drives the screw according to the screwdriving program.
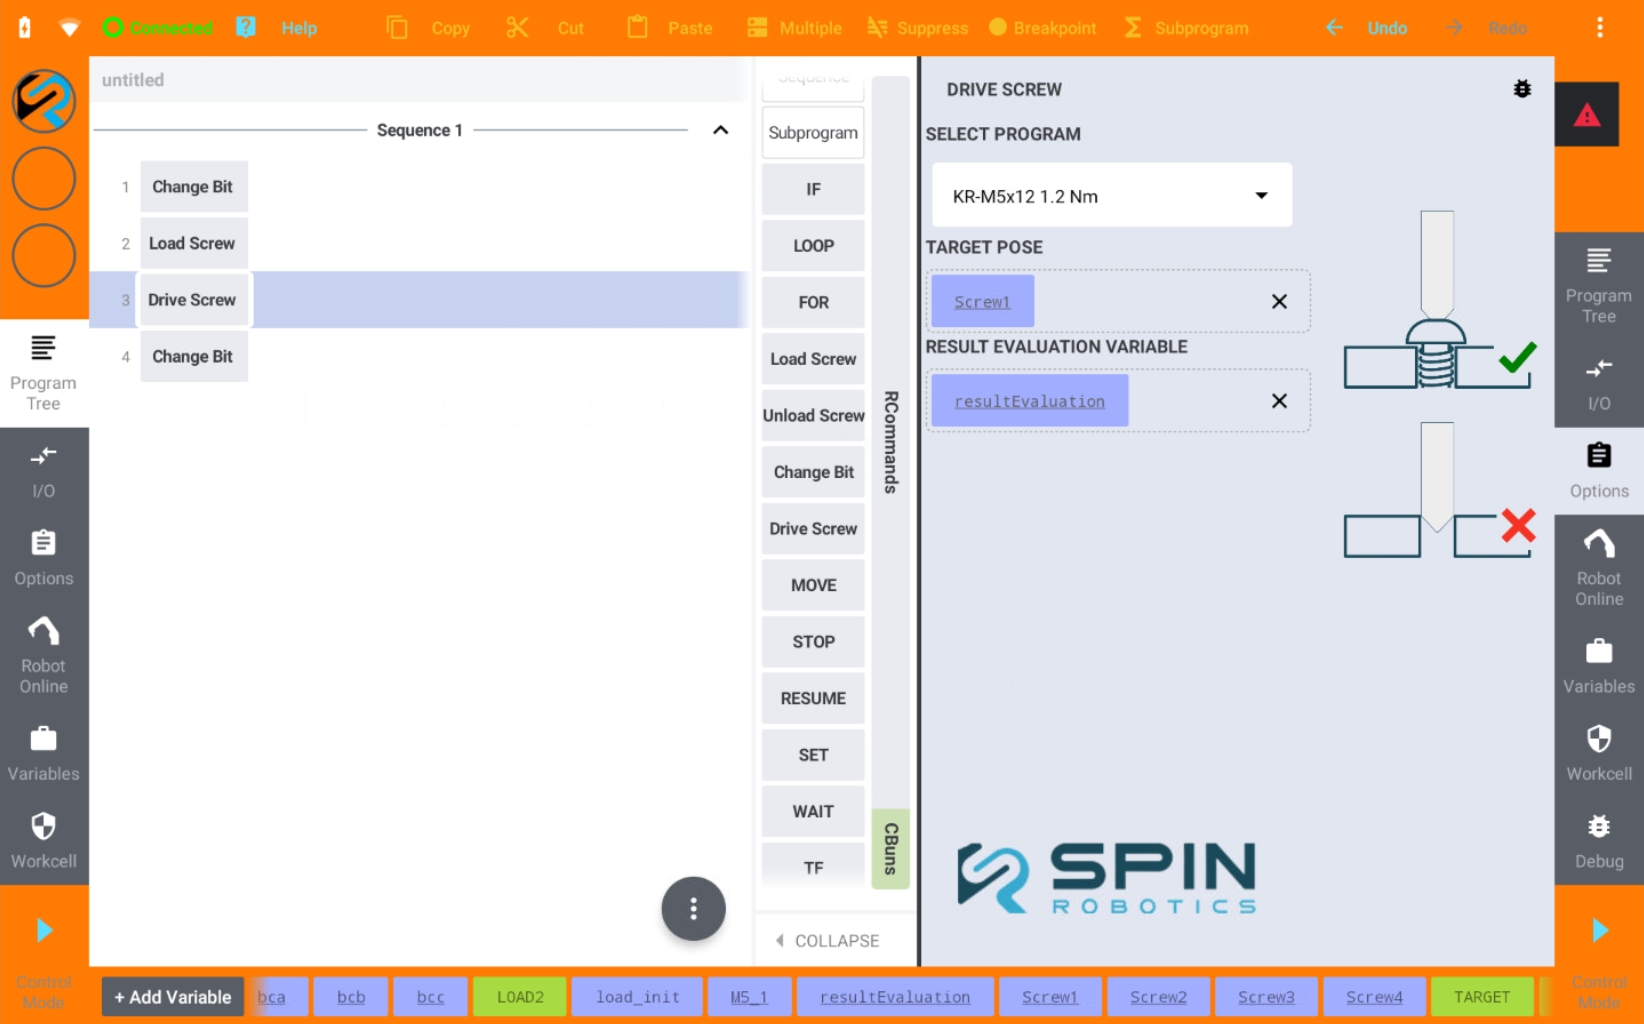
Drive Screw options panel.
From the Commands panel drag and drop the Drive Screw program command to the program tree.
From the drop down menu in the options panel select the screw program to use.
Teach the screwdriving target pose. See Teaching a Position. Save the pose in a variable and drag and drop the variable to the Target Pose field in the options panel.
Create a variable of type Number and drag and drop it to the Result Evaluation field in the options panel. This variable will store the result evaluation of the screwdriving operation.
Note
The orientation of the screwdriving target pose is important, since the screwdriving axis is defined by the orientation of the pose.
Note
The intention of the Result Evaluation variable is to store the evaluation of the screwdriving operation. The possible values are: 0: Fault, 1: Not OK, 2: OK. The user can use this variable to react on the result when the operation is done. For example, if the screwdriving operation is Not OK, the user can decide to execute program commands to handle this situation.
Fault: Lost connection, motor overcurrent, etc.
Not OK: Screw not driven in to correct torque, screw driven in but not to the correct depth, etc.
OK: Everything is OK.
The user must configure what is OK and Not OK for the particular screwdriving program in the Spin Dashboard. See the Spin Dashboard documentation for more information.